
For a long time I've been envious of hobbyists who have nice and expensive paint racks, or those with nicely customed painting areas to keep all their hobby needs within reach. So I went online to search and see what other hobbyists did to improve their painting experience with all sorts of DIY paint storage methods.
Some notable methods include magnetic strips attached to walls with washers glued onto the back of paint pots, acrylic racks customizations and of course the one I improvised upon. Most of these included a significant cost, especially acrylic customs. Therefore I made a trip down to the local hardware store to see what I could use that was easy to get hold of, simple to work with, and most importantly cheap.

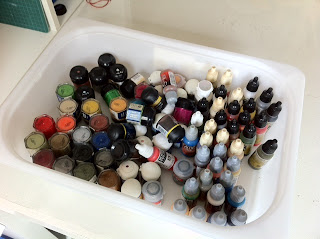
This is my painting space, with my paints all stored in an Ikea box. Like I mentioned each time I wanted to look for a paint I had to drag the box out, and rummage through them. On the left of my Ikea Expedit Shelf was an empty "wall space" that I wanted to fully utilize. Therefore I set that space to store my paints.


What materials was I going to use then? I settled upon PVC wire guide casings about 4cm wide, and to adhere these were industrial strength double sided tape. I paid $2.50 Singapore dollars for 10ft of tape. And $3 Singapore dollars for each 3ft PVC casings. That bring me to a grand total of $8.50 SGD. That's cheap if you ask me!
And I only needed the thicker half of the casing. This leaves me with 6ft of thin halves that I stored away to use in other terrain projects such as roads or whatever else I can think of later.


I then measured the length needed and clipped them with the trusty plastic clippers. And the next step is to measure accurately and mark out the positions on the "wall space" you want to adhere it to. Make sure the surfaces are cleaned and dust free. Also when marking out the space remember to do so at both ends to ensure the racks are as perfectly horizontal as possible. You don't want a slanted rack with paints sliding off!


After a repeated process of cutting and sticking. This is the final result. All in all took me less than half an hour to complete!


Here's a shot of the new paint rack complete with my paints for easy view and access!

Say bye bye to messy paint storage.

Hello space saving beautiful paint rack!
Hope this will help any one contemplating to enhance your painting experience. Go on, you know you have $8.50 SGD and half an hour. Right?
I have that exact shelving/desk combo (the expedit) and will steal this idea!
ReplyDeletemany thanks!
I am now following your blog, you can follow me too at
http://marsekayspainting.blogspot.com/
and join the network at
http://randomselecthobbynetwork.blogspot.com/
I'm glad this has helped! Enjoy your painting space :) and remember to post it up on your blog when you're done. Will be following it! Cheers.
ReplyDeleteThis is very smart. Great one Melvin!
ReplyDeleteepic idea. i will definitely be using this idea!
ReplyDeletethank you for sharing!
please where can i find those PVC wire guide casings things? i have been looking and can't find them anywhere
ReplyDeleteWas looking for some ideas on a diy rack.. thanks for the tip!
ReplyDelete